Keep it Shiny How to Make Your Car Paint Last

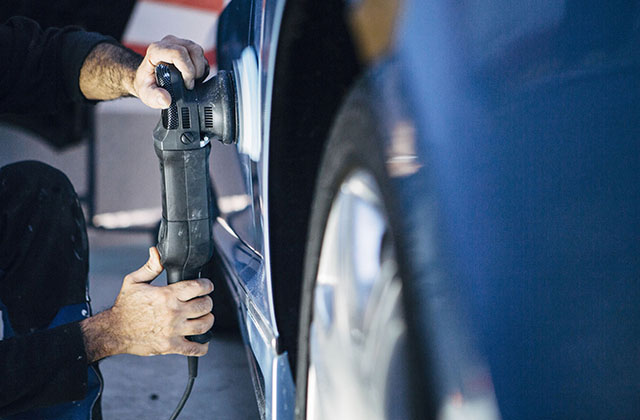
Cars owe much of their elegance and beauty to their paint job. If the paint remains true then your will look visually stunning throughout its life. However, making the car paint last isn’t an easy job. The airborne pollutants in the atmosphere make sure that the paint starts fading within a few months of its purchase. There are ways that can help in your Car Paint Protection efforts, though. Duragloss Polish & Cleaner is what we’d classify as a synthetic cleaner wax.

Wash it Regularly

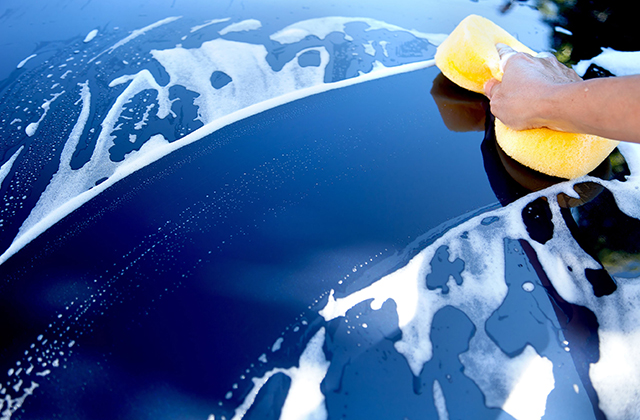
Regular washing is one of the ways through which you can protect your car’s paint from fading too quickly. The contaminants and pollutants responsible for damaging the paint can be cleared away with this exercise. However, do keep in mind that washing is carried out using just water and a good car shampoo. There is no need to use soap or detergent as they will cause further damage to the car’s paint. Moreover make sure that the washing is done on a weekly basis. This would ensure that there is no pollutant build up on the car’s surface.

Apply Wax

Another excellent means of Car Detailing is to apply wax to its surface. Waxing can help in adding a layer of extra protection to the car’s surface. It will stop the contaminants from reaching the car’s paint and thus minimize their damage to it. In addition to this, wax can also give your car a glossy appearance as well which will rival even car polish. However, the choice of the wax should be made after a lot of thought. Don’t just use any brand of wax for this purpose. Moreover, apply the wax in moderation and don’t go overboard with it.

Consider Having Opti-Coat

Opti-Coat is the most authentic means of paint protection. It offers a protective coat over the car’s paint which prolongs its life by many years. Opti-Coat has the ability to keep your shinning for a longer period of time. It has a special formulation which keeps the pollutants away from the car’s surface. At the same time, it offers the a gloss that can’t be rivalled by wax or car polish. If you want to take advantage of this new technology and have a coating of Opti-Coat on your then you should contact Detail Evolution. They are the authorised dealers and distributors of Opti-Coat in Queensland.

Click here, if you want to extend the life of your paint then you should consider utilizing the above mentioned methods.

Johnson Controls and Toshiba join forces to bring leading automakers low-voltage lithium-ion solutions

Johnson Controls and Toshiba join forces to bring leading automakers low-voltage lithium-ion solutions

Johnson Controls Power Solutions and Toshiba Infrastructure Systems & Solutions Corporation have partnered to deliver low-voltage lithium-ion solutions to meet automaker demands for improved efficiency, lower costs and less complexity. Under the agreement, Johnson Controls will collaborate with Toshiba to develop and manufacture lithium-ion batteries at its Holland, MI, plant and pair them with existing lead-acid battery technology as part of dual-battery systems. The new car paint protection process on the other hand, use a clear coat, which uses Carborundum, one of the hardest materials in existence, in its manufacturing.

Dual-battery vehicles are expected to be the fastest-growing form of electrification and by 2025 will account for approximately 20 percent of new vehicles built globally, according to IHS, Markit. Adoption rates will be even greater in locations with strict fuel economy standards. Because paired systems require minimal powertrain alterations, automakers can deploy them across multiple vehicle lines with a lower investment than other electrified powertrains. Consumers also benefit, as paired systems achieve up to 8 percent greater fuel efficiency than a conventional systems.

“Low-voltage dual-battery technology is the next step in the evolution of vehicle systems that helps to strike a balance between consumer demands, increasing regulations and automaker economics,” said Brian Cooke, group vice president, Products, Power Solutions, Johnson Controls. “Combining Johnson Controls’ partnerships and battery system capabilities with Toshiba’s lithium-ion cell expertise provides automakers with a compelling, competitive product for vehicles of today and tomorrow.”

“We are happy to team with Johnson Controls to advance the potential and application of low-voltage battery systems, and to use our lithium-ion technology to realize an eco-friendlier world,” said Fujio Takahashi, general manager of Toshiba Infrastructure Systems & Solutions Corporation. “Our SCiB™ is distinguished by its excellent characteristics and the use of a lithium-titanium anode to deliver safety, a long life, low-temperature performance, rapid charging, high input and output power, and a large effective capacity. It is also a good match with lead-acid batteries, and we are sure our joint work with Johnson Controls will greatly benefit automakers around the globe facing efficiency challenges.”

The Holland, MI, plant opened in 2010 and was first in the United States to produce complete lithium-ion battery cells and systems. The two companies plan to collaborate on future technology development and exploration of additional applications where Toshiba technology can be integrated.

About Johnson Controls:

Johnson Controls is a global diversified technology and multi industrial leader serving a wide range of customers in more than 150 countries. Our 120,000 employees create intelligent buildings, efficient energy solutions, integrated infrastructure and next generation transportation systems that work seamlessly together to deliver on the promise of smart cities and communities. Our commitment to sustainability dates back to our roots in 1885, with the invention of the first electric room thermostat. We are committed to helping our customers win and creating greater value for all of our stakeholders through strategic focus on our buildings and energy growth platforms. For additional information, please visit http://www.johnsoncontrols.com or follow us @johnsoncontrols on Twitter.

About Johnson Controls Power Solutions

Johnson Controls Power Solutions is a world leader working in partnership with our customers to meet increasing market demands for energy storage on a global scale. We create the most advanced battery technologies for virtually every type of vehicle on the planet. Our employees develop, manufacture and distribute the smartest portfolio of lead-acid and lithium-ion technologies in the world. These technologies deliver uniquely sustainable, next-generation performance. We partner with our customers at every link in the supply chain, contributing to the communities we serve and the planet we share. For additional information, please visit http://www.johnsoncontrols.com or follow us @JCI_BatteryBeat on Twitter.

About Toshiba Infrastructure Systems & Solutions Corporation

Toshiba Infrastructure Systems & Solutions Corporation is the core company promoting Toshiba Group’s business in social infrastructure. Split off from Toshiba Corporation (Tokyo: 6502) in 2017, the company and its group companies promote realization of a reliable products and systems for a sustainable future that is safe and secure, and seeks to improve value for customers with solutions for social and industrial infrastructure, buildings and facilities.

Common Car Repair Questions Answered Here

Common Car Repair Questions Answered Here

When you car has problems, getting it back on the road is very important usually. Not having a vehicle will make your entire life complicated. You don’t always need to pay huge amounts of money on car repairs.There are certain repairs you can do by yourself if you need to. Leather conditioner leaves a satin finish that is never greasy or oily.

Ask any questions about your car when you have. Preventing vehicle issues is a lot of saving money annually.

You do not have to call a mechanic when your car is giving your problems. There are a few things you can fix easily. If the repair is not difficult, you might save a bit of money if you make repairs on your own.

Referrals are a great method for finding an auto mechanic. Ask around for their recommendations. You can gain information about price and value that way. People can tell you what type of experience they had and whether the person was honest or not.

Test drive your car before paying for its repairs.

Look out for signs that repair mechanics may give off. If they talk to you in circles or they don’t pay attention to your questions, they may not be the one you want to work with. You should feel like you can trust them, so go elsewhere.

Always try to figure out the problem with your car’s problems yourself before you bring it in for repairs.You probably already know that some mechanics will deceive you about your car repairs to charge more money.

Make sure the mechanic you hire knows about your particular vehicle. If you don’t know, spend the extra money and go to an authorized dealer.

Assemble an auto repair kit to keep in the trunk of your trunk. Your car probably came with equipment needed for changing a tire. You need to get a lug wrench and a jack if you do not have them. You should probably get a Phillips and flat head screwdriver and several types of wrenches.

Although most repair shops can be trusted, you may end up paying for extra repairs you don’t need. Look for mechanics that specialize in your car. These types of shops are more likely to understand how to perform the repairs your car needs.

Try looking for someone who works from their own garage. If they have auto repair experience they can provide quality work, you can get the same work done at a much cheaper price. You may save tons of money and provide an independent worker by going down this route.

Look at all lights that flash on the dashboard and learn what each one signifies. These lights give you a good indication of when something is wrong with your car. Ignoring them for extended periods of time will not make the problem go away.

It can be very dangerous to repair vehicles on your own car. Always have a buddy to help you just in case of an emergency. Buy only the highest quality tools that will last and reliable. This is the case especially when you are investing in equipment to change your tire changing equipment. The jack you are working on the underside of the car. That’s why sometimes it’s smart to use a hydraulic floor jack that comes with jack stands that are approved.

Check the car’s tire pressure each time you fill up the tank. Look at the tires and make sure they there is nothing embedded in them. You don’t want to have to drive around with weak tires.

Take photos of your car before taking it to a new shop. Some shops strip vehicles and resell them. You should document what the vehicle in case you experience this terrible thing.

Avoid diagnosing your own car problems yourself.What may seem like a simple problem to fix can be quite complex, especially in the newer electric cars and also the newer computerized vehicles. Let repair shop diagnose your vehicle. Give them every detail about what happened and if there were any sounds associated with the problem, but leave the final diagnosis to them.

Don’t allow people to sell auto parts from anyone claiming that say they’re going to last forever. This is generally just a tactic they use to get consumers to buy those parts. One example of this is transmission fluid will last a lifetime. While this won’t have to be changed often, it must be changed around every 80,000 miles or so.

Bleed your brakes before you take your work is done on a test drive. Test it for leaks to ensure you don’t have fluid can run out. You should then get ready to take a test drive in an area with little to no traffic. Start slowly to be certain you’ve made a good repair is done well before risking higher speeds.

It may be a recall you didn’t know about. The manufacturer may fix your car free of charge.

AAA is an excellent ally to have on your side when you need auto repair issues.You can often find that AAA has many discount options in place.

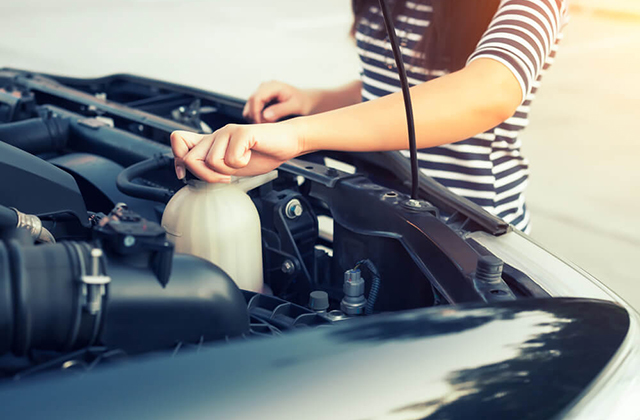
Don’t put water in the compartment for windshield washer fluid goes. Water can clean your windshield, sure, but that compartment is designed only to hold a special kind of fluid. You should check the level in the compartment and refill needs. Do not insist when the compartment is empty.

Now, you know that you don’t always need mechanics and their high costs to fix many basic auto repair issues. A lot of the time your problems can be solved when you’re at home. These tips will get you back to driving in no time.

How to Paint Fiberglass

How to Paint Fiberglass

Why Paint Fiberglass?

Fiberglass (Fiber Reinforced Plastic) is often susceptible to water incursion and/or sun damage, depending on the resin used. Epoxy weakens, with time, in sunlight. Polyesters are subject to water infiltration and vinylesters, though stronger than polyesters, are not as strong as epoxy. So prevent the pain with one of the highest quality, most durable car paint protection films in the industry.

Water incursion will cause blistering or bubbling, though this typically takes years to develop. However, once blistering appears it’s only a matter of time before the composite (fiberglass and resin) delaminates, and you have major problems on your hands. This is an especially important concern in boating.

Sunlight, usually with epoxy resins, will cause the composite to crumble. As you might imagine, this is pretty bad.
Industrial Coatings

Paints are used to add an additional barrier against both water and ultraviolet light (sunlight). In the “finish business,” these are called industrial coatings. A good industrial coating provides a protective layer against these incursions, and they look good too. For this document, I will simply stick with the “paint” designation, but if you hear “industrial coating,” now you’ll know what is being referred to.

In this paper, I will recommend two types of paint (not brands) and cover the pros and cons of using each type. No single coating provides perfect protection. Along with this information, I’ll also recommend two painting techniques. Any paint type covered here can be applied with either technique. So the paint type and method of application are completely independent of one another.

Two Types of Coatings Suitable for Fiberglass: Polyester- Versus Epoxy-Based

FRP stands for Fiber-Reinforced Plastic. There are two major categories of paint useful on FRP. They are both polymer (or plastics) based. One uses exposure to air to cure and the other a catalyst, temperature, and air. To be clear, air-cured paints are typically polyesters. They only require the “one-part” that comes in a single container. Catalyst-cured paints are referred to as epoxies; they come in two parts that are either equal in volume or slightly disproportionate quantities. Epoxies require a catalyst and, like “poly,” the right temperature range.

Because these paint types are basically plastics in a volatile liquid, they adhere well to the three resins used in creating fiber-reinforced plastic objects.

Any resin-based paint is suitable for application on FRP, but I recommend using epoxy-based paints with epoxy-based FRP resins and polyester-based paints on polyester-based FRP. I make this recommendation because like materials bond better. To put this another way, an epoxy paint bonds best on an epoxy-fiber reinforced plastic. Alternatively, polyester paints adhere best to polyester-based plastics. Similar plastics bond better to each other.

I will make an exception to this recommendation. Should you be painting a boat or other FRP object that is going to be subjected to temperature extremes and/or water immersion, I highly recommend epoxy-based paints regardless of the resin used in the FRP. Epoxy is simply a much more robust paint, particularly when that coating is subjected to salt or fresh water and near constant bumps and dings.

Epoxy, as long as it is protected from sunlight, is both strong and flexible. The pigments in epoxy-based paint will provide the ultraviolet barrier needed to protect the fiberglass beneath. However, if you store an epoxy-painted object outdoors, I recommend covering it with a tarp or fabric to give it some additional protection from the UV rays in sunlight.

What Is in the Paint

Paint typically consists of a vehicle (liquid), a binder, and pigment. In paints used for durable plastic coatings, these are volatile organic compounds (liquid carrier), polymers (binder), and pigment (color).

I do not recommend powder-coat due to the high temperatures required to bond this coating. Since powder-coats require temperatures of 300-350°F, fiber-reinforced plastics will almost certainly melt at those temperatures or, worse, catch fire.

Volatile Organic Compounds

A component of most of these paints is Volatile Organic Compounds (VOCs).

VOCs are liquids designed to evaporate at a set rate, usually quickly. The idea is for the liquid to remain fluid long enough for the paint to self-level, yet evaporate quickly enough to create a durable coating in a short amount of time. These compounds are not good to breathe, and appropriate protective equipment should be used while applying them.

Both one-part polyurethane and two-part epoxy paints use VOCs.

Binders

Another component in polymer paints is the binder.

Binders are the chemical compounds that cause the pigment particles to bind to each other. The binder is typically a plastic including resins such as acrylics, polyurethanes, polyesters, melamine resins, epoxy, or oil. Note that only the bold-faced materials mentioned work well on fiberglass.

Pigments

Pigments comprise the smallest percentage of paint. Though most modern pigments are chemically derived, manufacturers tend to keep the actual sources and formulations a trade secret. That means that knowing exactly what is in your paint may be impossible to determine. For that reason, you should always consult the paint dealer if you have any questions about what surfaces to use the paint on.
Environmental Considerations

Preparations for painting are almost everything; these include taking into account the temperature, humidity level, placement relative to direct sunlight, and even wind conditions.

Humidity

Relative humidity should be below sixty (60%) percent and temperature should be between 65° and 90° degrees Fahrenheit or 19° to 35° Celsius. Note that the lower the temperature (within the range), the longer the drying or curing time.

Temperature

If the ambient temperature is too low, the paint won’t harden or cure. If the temperature is too high, the paint will set almost instantly, leaving the layer just below in a liquid state. The result is a very poor paint job.
Sanding and Cleaning

Surface prep is very important. In fact, prep should comprise about 80% to 90% of the job. Paint will not stick to dirty, oily, or greasy surfaces.

Paint will not adhere well to glossy surfaces either, so sanding is a vital step.
Methods of Applying Paint

There are two main methods of applying paint to various surfaces: spray painting and brush painting. These methods are geared toward the home hobbyist or the adventurous hobbyist—the best one for you depends on the equipment available to you and/or your experience.

Spray Painting

The paint is applied with a compressed-air/or pumped-pressure spray gun. This requires a compressor and a good-quality spray gun, as well as paint filters, paint stirrers, eye and hand protection, masks (you don’t want to breathe the stuff), solvents, containers, and plenty of clean rags.

Roll and Tip Method

The paint is applied with a roller and then followed up almost immediately with the tip of a fine bristle or foam brush. Tools requirements are a solvent resistant roller, solvent resistant roller covers, brushes, containers, paint filters, eye and hand protection, stirrers, solvents, and plenty of rags.

Car Spray Paint for Removing Scratches

Car Spray Paint for Removing Scratches

The application of car paint protection Adelaide is easy-to-do and gives smooth finish effortlessly in single application. But before you buy car paint for scratches make sure you are aware of the apt methodology of using them else it can jeopardize your effort. Read further to apprise yourself with the directions to use the paint correctly in order to extract maximum benefits out of it.

First check the color. Before applying paint on the target area, apply a bit on any remote area. Match the color and its application and then you are good to use it as a Pro.
Prepare the surface before applying the Touch Up Spray Paint. For this, you will need a textured paper for rubbing off rust, old paint and other polish etc. this will lend smoothness to the target surface. Don’t forget to use masking tape to cover the rest of the area of the car from over spilling of paint.
For minor scratches, dab Emery Pad EP-2500 in water and mildly rub the scratch back and forth while applying a little pressure on it by hand. Repeat the motion till the scratch disappears. Wait for the area to dry a bit and as it appears to uniform and smooth you can use Com-Paint spray on it.
For deep scratches, use Com-Fill Paste. Use a rubber applicator to stroke light coats on the scratch. Don’t forget to instantly wipe off excess paste. Leave the paste at rest for at least 30 minutes. With the help of EP-400, apply uniform pressure on the area to be touched up with the adjacent area. Now apply spray paint on the surface.
Before use, shake the Com-Paint Can vigorously until Agitator ball moves freely. Keeping the can at a distance of 25cms from the target surface, spray the paint in stroking motion to eliminate dripping of paint. A gap of 5 minutes is advisable between the coats.
After finishing the application, spray Com-Merge-Finishing Solvent on the outer area of the target area to let the paint merge with the surrounding surface. Let the area dry for 72 hours. If the spray can button clogs, it is better to clean or replace the tip of the applicator in order to cause blot while painting.

Follow these six easy steps and you are done with saving the shine of your car while making it appear scratch free. Take a clean cloth in the end and rub across the area to restore the shine and give finishing strokes.

TIP: Keep Emery Pads and paint surface wet while dabbing. Do not use the product if the surface is hot to touch. It is advisable to use masking tape only while using touch up paint for cars to protect other areas from over spilling of paint. Use of any other tape or cello tape may cause the paint to scale out. It is ideal to use the products of the kit only as they are meant for complete action and to rectify errors at every proceeding step.

Expand Your Knowledge Base Concerning Auto Repair

Expand Your Knowledge Base Concerning Auto Repair

Have you thought about what you can do to deal better with car issues more effectively? Have you considered doing auto repairs and maintenance yourself? Maybe you just want information on how to choose an qualified auto technician to get the job done right. Read on to find out more regarding these choices. Window cleaner mostly refers to the exterior surface that collects bird poops, dead bugs, and dirt from the environment.

Ask a mechanic any questions you have at the shop. Preventing vehicle issues is a valuable skill to save money annually.

If you aren’t sure about anything, don’t hesitate to clear this up with the mechanic before allowing him or her to make repairs to your vehicle. You want to avoid being surprised with additional charges once the car.

You must wash your car often to avoid rust.All cars eventually get rusted, but you may delay it considerably by ensuring all chemicals and salts are washed off quickly. Use a decent wax to protect your paint jobs as much as possible.

Look for warning signs that repair company. If you are being talked to in circles and your questions aren’t answered, they may not be the one you want to work with. You need to be able to trust the person doing your repairs, so don’t fear seeing someone else.

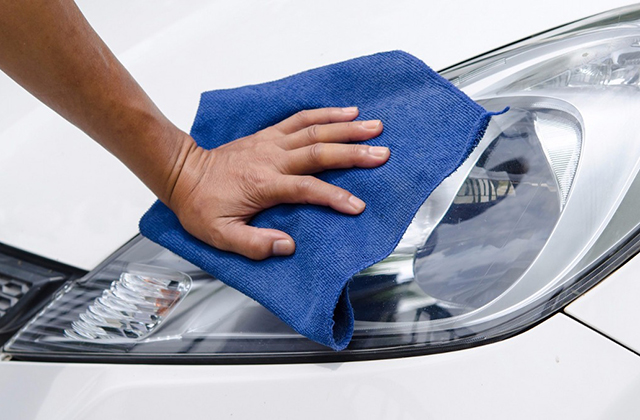
Replacing a burnt-out headlight or taillight is much cheaper when you both time and money. While it’s easier in some vehicles than others, it is much cheaper to do it yourself. Ask whether someone you know can instruct you on how to do it.

Do not neglect your windshield wiper blades. You may need new windshield wipers if the ones you have are streaking or making noises and leaving streaks on the glass.

Try looking for someone who works from their own garage. If they possess sufficient experience, and they will usually charge you less for labor.You can support small business and save a lot of the repair.

Check the tire pressure in your tires when you fill your gas tank. Look at them and make sure that they don’t have anything embedded in them. You do not risk driving around with faulty tires.

There are several different kinds of parts. New means that the parts are made to meet the standard manufacturer specifications by an independent retailer or the dealer themselves. Refurbished or rebuilt parts ate those that these parts have been restored to working condition. “Salvage” means that the parts are used and hasn’t been fixed.

Be certain your technician you choose is certified. You want to see if they know how to work on vehicles properly. You will get better service if you go to a mechanic who has been approved by this certification.

Don’t let a mechanic talk you that getting an engine flushed is normal maintenance. This is a costly service is very expensive and it isn’t necessary unless you have neglected engine care for some time.

AAA is an excellent ally to have on your side when you’ve got auto repair. You are going to find discounts on an annual AAA membership if you shop around.

Keep an accordion file with all your important repair receipts in your vehicle. You can categorize them chronologically or by service repair type. This is particularly valuable when you get your car.

Having written proof can help you need to complain down the mechanic.

Ask to have your mechanic to give you the old parts that had to be removed. This is an excellent way to ensure the repairs have actually been performed. This isn’t particularly necessary for exhaust system changed.It is easy to tell whether or not a new exhaust has been replaced.

When dealing with auto repair estimates, you should have him or her write down the costs of each component. This will help you compare estimates from two mechanics. The cost of the actual parts should be close, but the labor is where you will find the deal.

Take a little time to learn about the car and model. You will only be able to sidestep the mechanic if you spend time learning about your car. You can save some money after all is said an done if you’re not paying a flat tire yourself.

Find a mechanic who is already familiar with your cars similar to yours. Ask them about their experience; find out if they have previously worked on your particular make and model.

Don’t buy into the theory that you need a tuneup at 10000 miles.This is a fallacy and model of your car. You would better off if you followed the maintenance instructions in the manual that came with your car.

Once you figure out what is wrong with your car, go online and search for spare parts and comparison shop. There are several websites you can visit to get an estimate of different repairs for your vehicle. Compare this estimate with quotes you receive from auto repair shops give you.

Rotating tires regularly can really help you keep them longer. You should have them rotated around every 6000 miles, but this can vary depending on the make or model of the vehicle you drive. Get high-quality tires to avoid too much wear and tear too quickly.

You need not feel helpless when it comes to auto repair. You really need to take your time and think over what you have learned here so when it comes time to do it, you can act. Now, you can see that there are some things you can even take care of yourself.

Information to Consider When Buying a Pool Cover

Information to Consider When Buying a Pool Cover

For most of the country, other than the lucky ones in Melbourne, Australia, use of the swimming pool is seasonal so why not get in touch with pool removal Sydney. Every fall triggers the end of the pool season, which means people across the country must begin the task of closing down their pools.

Winterizing the pool, as some refer to it, includes preparing the water and pool equipment for the winter as well as covering the pool. Ensuring debris stays out of the pool during the off-season will reduce cleaning time during the task of opening the pool for the next season. Selecting a pool cover to protect the pool from the harsh winter is an important part of closing down the pool.

There are two main types of winter pool covers: 1) A solid vinyl cover and 2) A mesh cover. Solid vinyl covers come in varying qualities with different thickness and warranty coverages available. Mesh covers typically come in one standard quality.

Solid vinyl covers tend to be heavy, depending on the thickness and size, and usually require two persons to install and remove. However, they work well to keep out debris, sunlight, and water. Keeping out sunlight is critical in that it prevents the growth of algae in the pool. Keeping out water is good in that it keeps out dirty water that has mixed with the debris on top of the cover. These covers do create water pooling on top of the cover which will require draining. An equalizer air pillow and submersible pump are the usual accessories to go along with a solid vinyl cover. The pillow will make it easier to remove pooling water and debris. When your pool water freezes, it will also compress to relieve the pressure on your pool walls from the ice expansion as well as prevent the vinyl pool cover from freezing by lifting it off of the water. A submersible pump is typically used to remove pooling water off of the pool cover.

Pricing of solid vinyl covers tends to go hand in hand with durability and longevity. A wide range of solid vinyl pool cover options are available varying by price, thickness, and warranty for any given size. The standard thickness options are 8 mm, 12 mm, and 16 mm. Warranty coverage on these pool covers vary based on thickness with the minimum typically a 8 year limited/1 year full warranty and a maximum of 20 year limited/3 year full.

Mesh covers are lightweight, which allows them to be installed and removed typically by a single person. Additionally, they allow water to slowly flow through them thus preventing water pooling on top of the cover. This is one of the main benefits of a mesh cover because it eliminates the need for a submersible pump to remove the pooling water. An equalizer pillow is a recommended accessory for mesh pool covers in places where the water will freeze. A downside to a mesh cover is that when it allows water to pass through to the pool, it allows dirty water to pass through to the pool that has been mixing with the debris on top of the cover. This may result in the pool water needing serious attention and cleaning when it is time to open the pool.

Shop a wide variety of winter pool covers, both solid and mesh, at http://www.allpoolfilters4less.com. Many different sizes for both above ground and inground pools in stock and available for immediate shipping.

Article Source: http://EzineArticles.com/expert/Gary_Bowers/574908

Article Source: http://EzineArticles.com/9540592

An Introduction to Electrical Training Courses

An Introduction to Electrical Training Courses

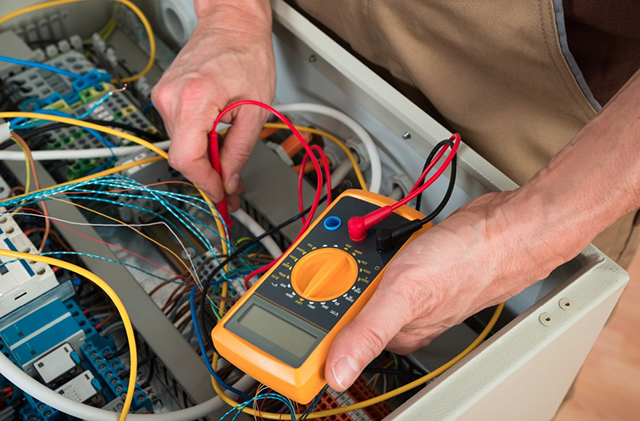
Electricity is without doubt one of the most important features of today’s life that is the reason why electrician Brisbane 24 hours is in demand. Hence, reliable electrical staff tend to be vital to all of us. Effectively the work comprises fitting, maintaining along with testing electrical systems, equipment and devices under rigorous safety legislation. During ’09, about six hundred thousand individuals were engaged in one segment or another in the United Kingdom’s power industry. If it’s the perfect time that you should make some occupational corrections, training to become an electrician may very well be a good idea.

No matter what your own starting place, you’ll contend with a variety of key procedures whoever you learn with. A great rounded path for starters could well be some sort of EAL Domestic Contractors Study course, at Level two. Training may include installation, basic safety techniques, cabling and re-wiring throughout homes, as well as testing circuits. Your instruction might provide help to qualify for Part P – these days a legal necessity for a lot of domestic electrician employees. Electrician installers must also complete the C&G Certificate ’17th Edition’ IEE Cabling Regs, thus you may be expecting preparation for the purpose of that. Labouring in the direction of a majority of these industry-recognized accreditations would certainly ready you not only to work upon projects in kitchens and bathrooms, with lighting circuits plus wall sockets etc., but additionally to self-certify them in the process.

People regularly question whether or not they might possibly be successful with this position. To be a domestic electrician you will want to be confident to make use of many different tools effectively. It is necessary to be skilled to conform to health and safety guidelines and procedures, as a result you need to have the ability to carry out responsibilities with perfect accuracy. It is not unusual for electrician employees to spend a great deal of their work-time alone, this means you ought to be happy in your own company. Some electro-mechanical employment necessitates a measure of energy, as a result you’ll find it good to be physically in good shape. And in the end, virtually anyone aiming to launch their own enterprise must remain focused and also determined.

You will find that a typical domestic electro-mechanical instruction program can take between 300 hrs and 400-500 hours, and should be a mixture of home-work together with workshop examinations. One could be successfully earning a living on customers’ properties two or three short months from today – building a stable future.

Tons of career-changers consider electrical jobs, so they might set themselves up for a small business. Almost all newly trained mature electrical employees opt to either perform the job for themselves, or simply on some contract structure. Moreover, at this time there looks to be an uninterrupted substantial demand for electrical trades-people throughout private homes, consequently it might work especially nicely. Sometimes, individuals with various other trade competence require electrical experience, in order to grant their small business additional credibility. Yet other people learn in order to save some cash by not paying trades-people to undertake their electro-mechanical labour.

From the commercial perspective, currently employed electrical engineers in most cases do a 37 hour week, along with possible overtime during the weekends. Commonplace wages during 09 ended up roughly 26K, as per SalaryTrack ’09. Nevertheless, electricians that are self-employed will expect more inconsistent days, however they also can receive significantly more. They will have to take their own overheads in to consideration in addition nonetheless.

Should customers identify a great domestic electrical engineer they’re happy with, they may speak with various other men or women about them and cause a good deal of zero cost promotion. You would be taught all of your specialized know-how on any meaningful training course, but also don’t forget to maintain helpful personal skills as well.

In England, search mainly for C&G (City & Guilds) coupled with EAL training courses. And of course, teens going through C&G exams in technical training colleges can look for working assignments in order to complete their much more practical NVQ’s. Though, as expected it requires a number of years. More experienced candidates generally decide on shorter retraining programmes that they may well work through at their convenience. Many people never require time consuming NVQ education, because they’re seeking jobs within private homes. Different re-training paths are generally provided through professional companies which may quickly bring about marketplace-accepted certificates. This cuts down the complete accreditation set, but it meets the trade specifications for the particular areas called for, and for that reason provides a shorter plus much more direct path to the field.

(C) 2009 – J. Kendall. Visit Click HERE [http://www.electricaltrainingcoursesgb.co.uk] or Electrical Training [http://www.electricaltraininginfo.co.uk].

Article Source: http://EzineArticles.com/expert/Jason_Kendall/413179

Article Source: http://EzineArticles.com/3853391

Electrical Mains Board Replacement

Electrical Mains Board Replacement

Does your electrical fuse board need upgrading? Out of date mains boards cannot keep up with the increased power demand that modern homes require. Today’s modern homes require more electricity due to the increasing list of electrical appliances, modern television sets, games consoles, surround sound, hair & beauty appliances etc. Home offices also add to the increase demand with computers, printers, faxes, all on cable modems. Today’s modern kitchens also use more appliances than ever before, such as huge American style fridge freezers, dishwashers, blenders, bread makers, toasters, electric ovens and extractor fans. All these modern appliances help to make life much easier, however they also increase the power demand placed on your mains board. Electrician Brisbane Southside offer professional domestic and commercial Electrical Services.

The older the property the less efficient the fuse board will be to deal with the increased demand from all these new extra appliances. The older fuse boards that were installed when the property was first built would have been sufficient enough to power to the maximum demand of the day, However as already covered the power demand has increased and the older boards did not have the MCB (miniature circuit breakers) these help to ensure that each part of the homes electrical installation was safely separated, for example all of the upstairs sockets would now go on to there own ring main connected to its own MCB on the mains board, Older mains boards only had four rewire able fuses, this meant that the different ring mains had to share. An electrical fuse board up grade or a full house rewire can bring your property’s electrical requirements up to date with current demands, helping to ensure it keeps running efficiently.

Can you answer yes to any of the following questions?

These are indications of problems with your fuse board or wiring:-

If when you are trying to run multiple appliances at the same time the electric keeps tripping out.
Do you have problems with the brightness of your lights?. i.e do the keep flickering?
Do you experience problems with the electrical feed to your appliances? i.e. power surges?

These can all be an indication that there is an overload of electricity to the fuse board, the electrical installations are out of date, and are in need of an upgrade.

Upgrading your electrical fuse board is quite straight forward to an experienced electrician. An upgrade to a modern fuse board will increase the capacity of the electric supply around your home and stop any problems that you had been experiencing with the old fuse board.

In some cases an upgrade of the fuse board will not fix the problem and a full rewire will be required. This involves replacing all the wiring and sockets, light fittings etc around the home. As mentioned before this should only be carried out by an experienced electrician or electrical contractor and should not attempted by a DIY enthusiast, if you are looking to reduce the cost of the house rewire then try to find a electrician who will allow or advise you on preparing your house for a rewire, ie chasing out the walls where the new cables will be laid, and removing all rubble and debris. This means electrician simply has to come in and run all the cables down the wall and wire up all the sockets.

Having a straight forward house rewire and fuse board upgrade will bring your mains board up to the current power needs of your home. If you are considering installing any additional high powered appliances or gadgets to your home an electrician will be able to advise you on any extra sockets that may be needed, rather than using too many multi point adapter plugs.

The safety of your home will also be greatly increased as multi point adapter plugs are one of the biggest causes of electrical fires. An up to date fuse board and wiring also ensure that the electricity running around your home is running safely and efficiently

As with all things the best way to find a good electrician is first to ask your friends, relatives or colleges if they can recommend one maybe they had work done by them in their home that was carried out to a high standard and were happy with the services and had no problems afterwards.

There are a lot of tradesmen online and listed in the directories on the net ie yellow pages, and the new eBay style find a tradesman sites.

A good electrician will always come out and have a look at the existing wiring and advise you of the work that needs to be done and give you a no obligation quotation. It is a good idea to get at least three quotations from different electricians.

Don’t let an out of date and old fuse board reduce the performance of your electrical appliances. Contact your local electrician today.

Builders and electricians Manchester.com easy access to over 30 qualified tradesmen all works carried out to the highest standards for Electrical mains board replacement [http://www.buildersandelectriciansmanchester.com] or Electricians Manchester [http://www.buildersandelectriciansmanchester.com] FREE no OBLIGATION quotation.

Article Source: http://EzineArticles.com/expert/Duncan_Beech/453855

Article Source: http://EzineArticles.com/4973430

Auto Restoration – These Are The Steps That It Will Take To Build A Great Looking Car

Auto Restoration – These Are The Steps That It Will Take To Build A Great Looking Car

I know that I have done something like this in the past, bit I will try to expand on the earlier article. Keep in mind that this will by know means cover the entire gamut on this topic. First and foremost is that you want to learn as much as possible before you begin the project. Each time we do a repair on your car we make sure we are using a breakthrough paint protection for the portion that has been damage.

Now that I have covered the easy stuff, let’s dive in head first. Obviously when I say learn as much as you can about the car before you start the project; I mean read the magazines and publications related to the steps of the restoration of a car.

Let me outline a few of my choices as far a reading material on this subject. My favorite publication bar none is Hemmings motor news, this publication holds a wealth of information on this subject. Hemmings also covers locating parts, and quite a few other things that you may need.

Next I would say that you should subscribe to publications like Rod & Custom magazine, this magazine will also help you greatly as you learn about the car your restoring. I know it all sounds like a lot of reading, but the more you know, the better it will turn out in the end.

Also I would recommend Car Craft magazine, and Hot Rod magazine, these are great magazines. They will often expose a complete build on a car, I have read quite a few of those issues. They give a lot of good tips and information that you can use.

Finally the last stage of the reading, got to a Barnes & Nobel book store, and get any books that you can find that are related to the specific car that you want to restore. This includes the By The Numbers books, and anything you can find that focuses on your particular car.

That finishes the reading part of the process; now we will assume that you already have the car that you want to restore. We can proceed to the inspection of the car, this begins with the front of the car and works to the rear of the car, or you can work from the rear forward if you prefer.

During the inspection we will be looking for things that need to be replaced or repaired. What you will do here is get a notebook, or a laptop computer. Divide a page in to three sections; at the top your going to label the sections good, repair, and replace.

In these sections you will be putting the parts that belong in each section in the appropriate section. I would also suggest taking pictures of all of these parts before you remove them from the car. This will build your first parts list, you can begin buying the parts for your car.

This will more then likely be a huge list because you will be covering every part of the car, from the grille, to the tail lights. You don’t want to miss anything, it will slow you down in the end. After you have finished this; you can move on to the tear down stage of the process.

During the tear down stage of the process, you will find more parts that need to be replaced, or repaired so keep your list handy. Remember you can never take to many pictures. The pictures will help you re-assemble the car when it goes back together.

At the first of the tear down process I will tell you one thing, you will need a lot of boxes; you can’t have too many of them. As you tear the car down you will label boxes for the front end something like this steering, suspension, grille, bumper, and the like.

The better that you do this part the easier the car will go back together, oh and by the way, you will need a lot of plastic bags of all sizes. You will also need a boat load of labels for those bags, In the bags you will store nuts, bolts, screws, and other small things that you would otherwise lose.

Don’t think for one minute that you will remember where every nut, bolt, and screw came from. I don’t care if you have a memory like an elephant, after the car sits a while, you will forget. I say this from experience, it has happened to me in the past.

Now we move from tare down to the media blast stage. This is the stage where we get the car to a media blasting company. Depending on how much money you have to spend, will decide on the media that you want to use to blast your car.

I prefer soda blasting, as it won’t damage the sheet metal on the car, and a sand blaster who is just learning the ropes can ruin your classic car for you. This is why I would plan to spend the extra money to soda blast, or acid the car.

Both process are messy for you to clean after you get them back, you will be blowing sand, or soda out of all of the tiny little cracks for quite a while. With the acid dipping you will find that in the cracks on the car also, you need to get all of it out.

If you don’t and you leave sand, or soda in the car; it will come out in your primer, and in your paint. You know that means ugly paint; and for the acid, if you leave any of it your primer will peel in the areas that you didn’t clean it out, all it take is water to clean the acid out.

The next stage is the major body work, such as rust, frame damage, and big dents. This is the time when the real work starts. You will be cutting, pulling, welding, and grinding so get ready to get down an dirty here.

This stage will usually take quite some time, so be ready to spend the hours getting this right. After you have finished the cutting, pulling, welding, and grinding; you can move on the the finish body work. This is the stage where the car starts to really look good.

When you first start on this stage of the body work your car should have the rough body work completed already. This means that the body work areas of the car should all be mudded, and finished to 40 grit sand paper.

In the finish body work stage you will complete the body work. What this means is that you will be adding more body filler where you need it, and the finishing that body work to 80 grit sand paper on the longest hand file board that you can find.

You need to check the body work areas for smoothness every once in a while. You can do this by putting a cloth on your hand, and running it over your body work area. The reason I say use a cloth is simply that you can feel the work better that way.

The next step is to apply some metal glaze to your body work areas, this is a thinner type of filler designed for very small dents and waves. After you have applied the glaze, you cane finish it to 180 grit sand paper.

After you have finished the entire car to 180 grit sand paper on a hand board. Your ready for the first stage of primer. If you have a lot of bare spots, I’d suggest that you start with an etching primer before you move to urethane primer.

I would always give primer of any kind at least 24 hours to dry. After the primer has dried you can hit it lightly with some 600 grit wet sand paper, then spray the entire car with three coats of high build urethane primer, waiting 15 minutes between coats for flash time.

This is all for this article, I will cover the sanding of the primer in another article. I hope this has helped some of you.

Steps In A Car Restoration [http://autorevival.com/?p=3066]

I’ve been in the automotive business for about 20 or 25 years, I have worked in all facets of the industry, from parts to restoration, all different makes and models, I just want to keep people interested in the old cars because it’s where my heart is.

[http://autorevival.com]

Article Source: http://EzineArticles.com/expert/David_Atkin/19638

Article Source: http://EzineArticles.com/4839021